Turning an idea into a real landing page often gets stuck at the same place. You already have a visual reference in mind — a poster, a design mockup, a competitor’s screenshot, or even a rough sketch — but the gap between that image and a working HTML page still feels like a project. Designers need to reconstruct the layout, developers need to wire up the structure, and content needs to be written out again from scratch.
This article focuses on closing that gap. Instead of treating the image as inspiration you study and then rebuild by hand, we treat it as a direct input. You upload a design image or a promotional poster, the AI extracts the structure and key content, and you get back an HTML landing page you can immediately preview, refine, and ship — without writing code.
This is exactly the kind of workflow HtmlDrag AI Creator is built around. With File Mode, you can feed in images or documents and generate a landing page from them; with Thinking, the system spends more effort understanding denser materials before it builds the structure; and with Template Mode, when you do not have a reference image, you can still steer style and HTML size directly.
Why This Topic Matters
Generating a landing page from an image is one of the most practical no-code website topics right now, because most teams already have more visual material than structured briefs. Product screenshots, launch posters, reference sites, Canva exports, and design mockups are everywhere. What they are missing is a fast way to turn those visuals into an actual HTML page that behaves like a landing page instead of a static image.
- generate a landing page from an image without reconstructing it by hand
- convert a design mockup or poster into an editable HTML page
- upload a screenshot and get a real landing page structure, not just a rendered preview
- start a page from a product brief, markdown note, or short document instead of a blank prompt
That makes image-to-landing-page a strong long-tail topic for founders, marketers, consultants, and non-technical operators who already have a visual reference but do not want to spend a full sprint on the first version of the page.
Why Most Image-to-Landing-Page Workflows Still Feel Slow
Most attempts to turn an image into a landing page fail not because the image is unclear, but because the workflow around it is fragmented:
- plain screenshot-to-code tools give you markup that still needs heavy cleanup before it feels like a real page
- pure prompt-based generators ignore the visual you already have and produce something that does not match the reference
- Figma or mockup workflows usually assume you already own the source file, not a finished image or a screenshot
- document-based briefs like DOCX or markdown rarely get treated as first-class input for landing page generation
- custom style and layout size are often locked until late in the tool, so the first draft is almost always wrong-shaped
If the workflow can take an image, optionally pair it with a short brief, analyze the content in depth when needed, and let you set style and size up front, the first landing page draft can already be close to usable. That is the workflow we walk through below using HtmlDrag AI Creator.
Step-by-Step: Generate a Landing Page From an Image Without Coding
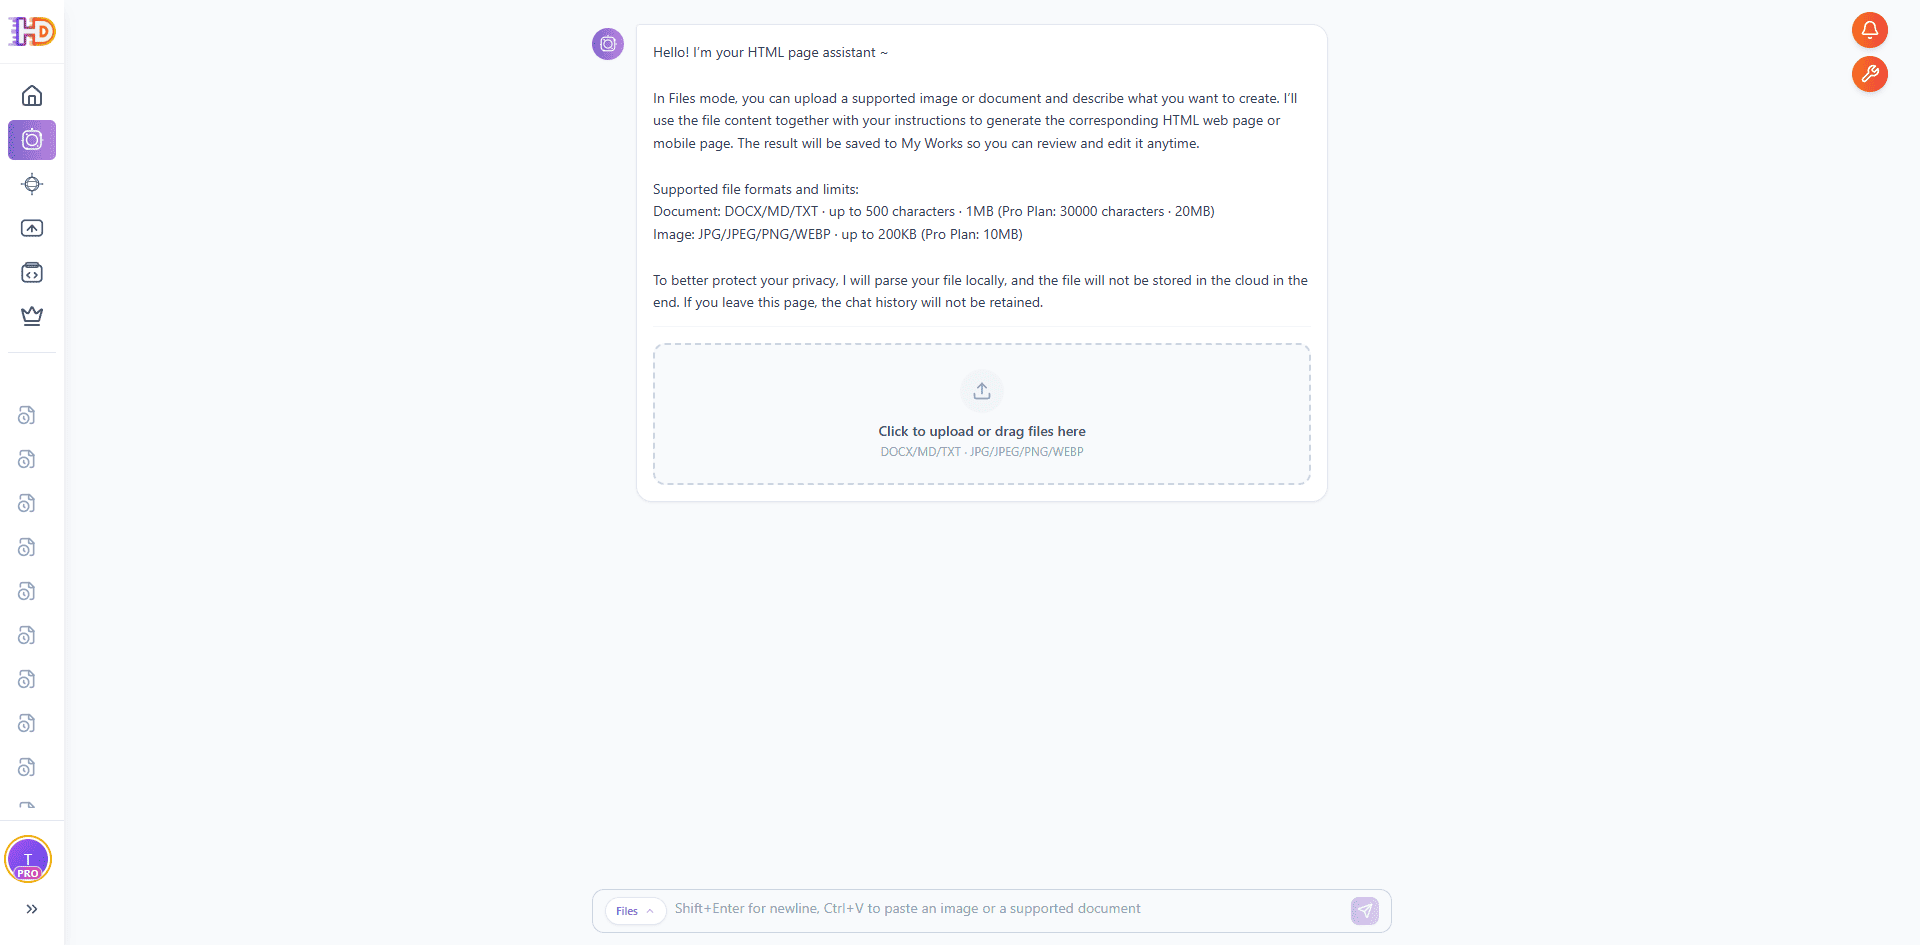
Step 1: Open HtmlDrag AI Creator and Switch to File Mode
Open HtmlDrag and go to AI Creator. You will see two main ways to generate: File Mode and Template Mode. For turning a design image or poster into a landing page, choose File Mode. File Mode is designed for generation driven by uploaded material — images or documents — instead of a pure text prompt.
Supported upload formats include JPG, JPEG, PNG, WEBP for visuals, and DOCX, MD, TXT for text briefs. That means a product poster, a Figma export, a UI screenshot, a hand-drawn wireframe photo, or a short markdown brief can all be used as the starting point.
Step 2: Pick the Design Image, Poster, or Reference Screenshot You Want to Generate From
Before uploading anything, the real starting point is the reference itself. Pick the image that best represents what you want the generated landing page to feel like — a promotional poster, a landing page mockup exported from a design tool, a screenshot of a reference site, or even a photo of a rough sketch. The clearer the hierarchy and messaging in the image, the closer the first generated page will feel to what you had in mind.
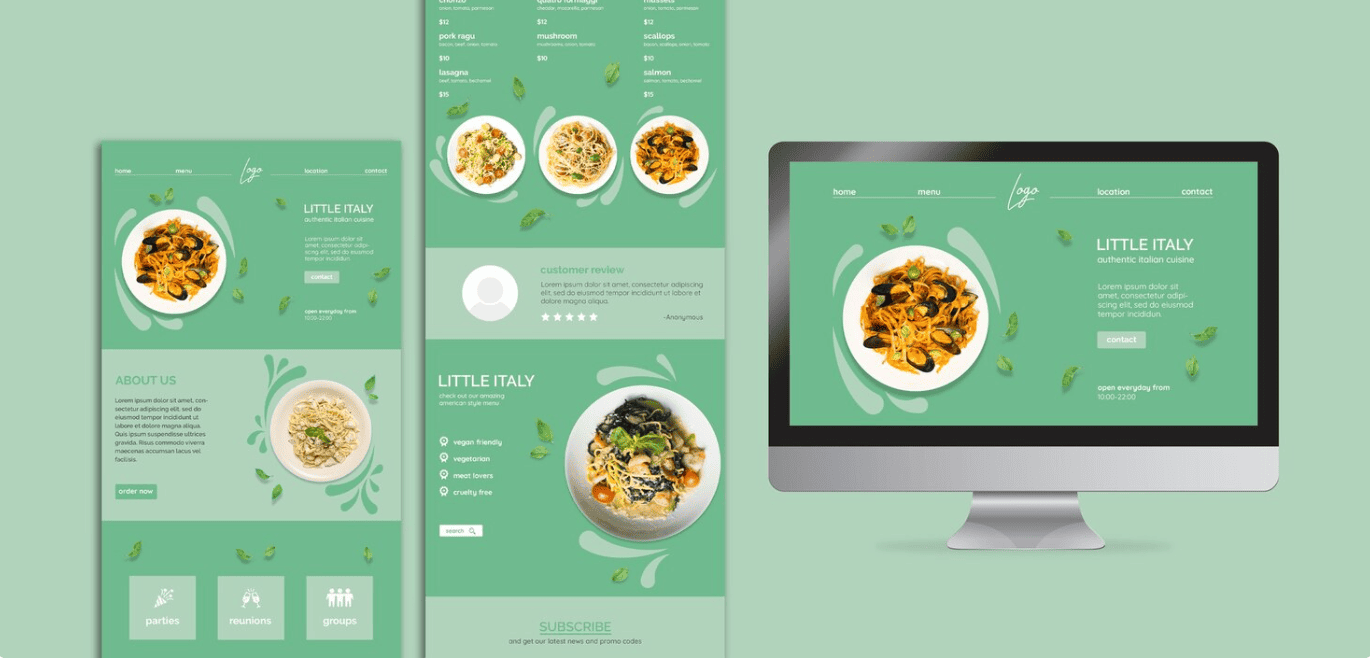
For this walkthrough, we use a Little Italy restaurant landing page concept as the reference. It is a single image, but it already carries all the signals File Mode can work with: a hero visual, a clear color and typography direction, supporting food photography, a menu-style section, a customer review framing, and a footer signup block.
Step 3: Upload the Image, Add a Short Intent, and Optionally Turn On Thinking
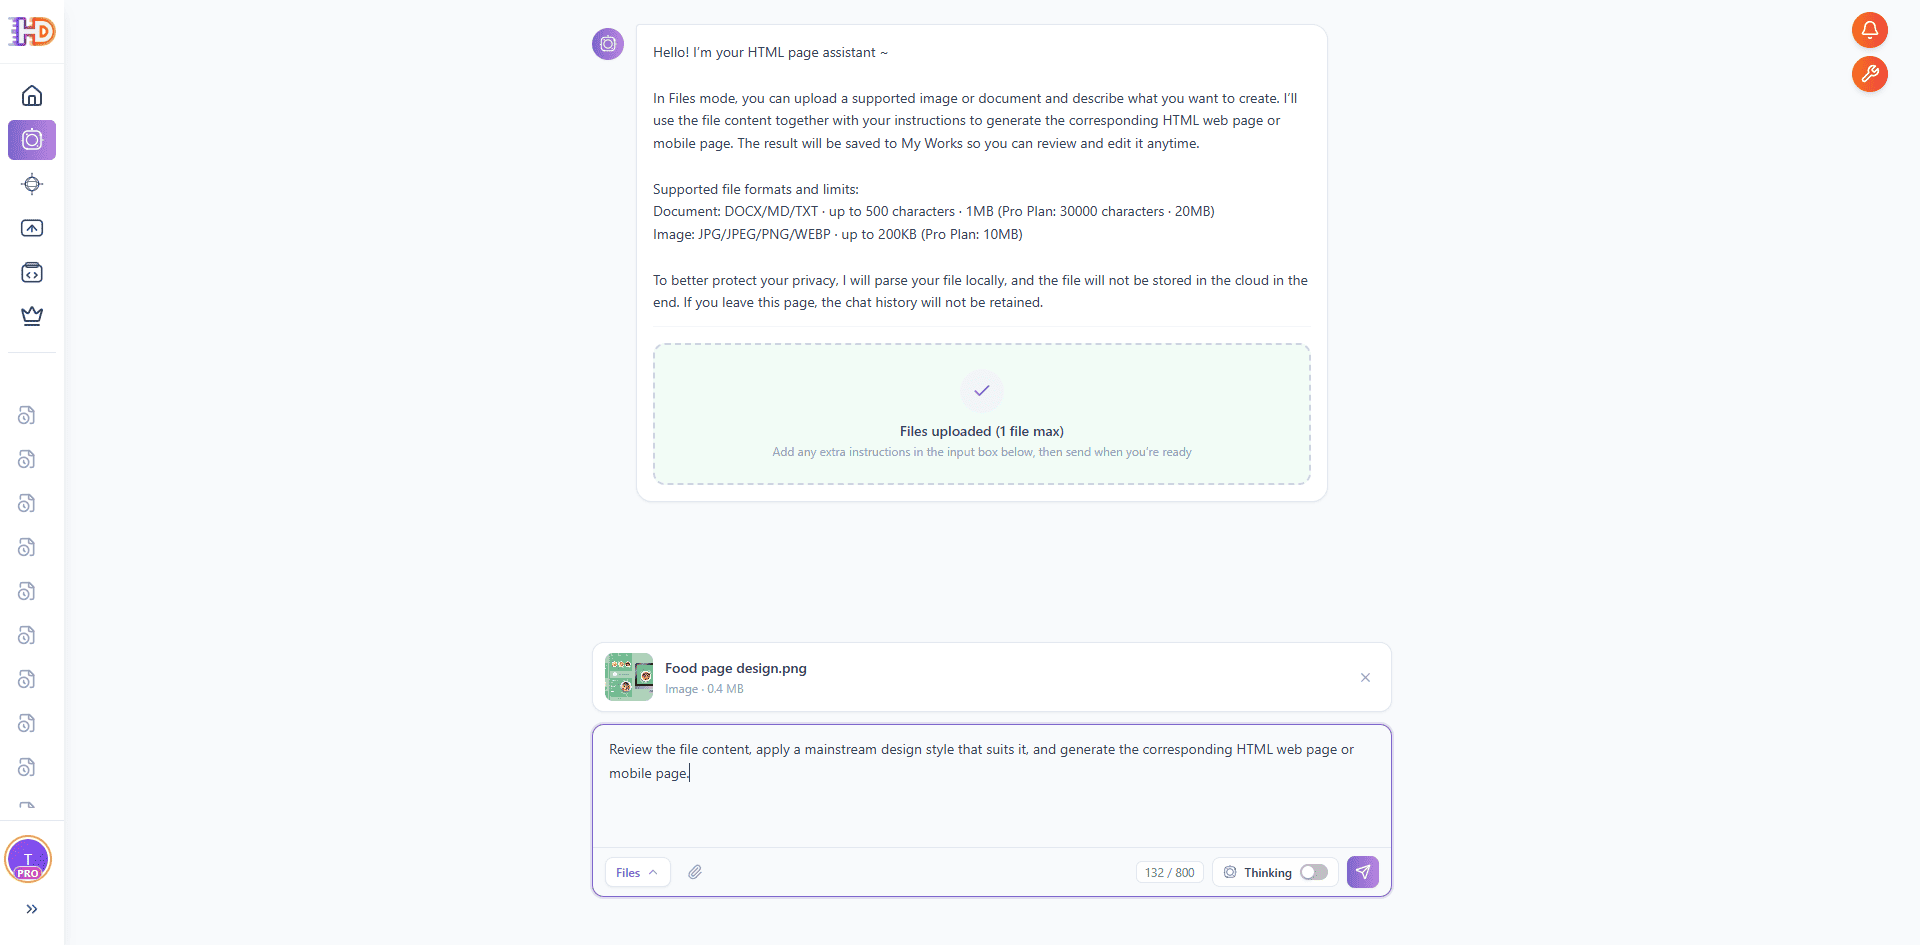
Drop the reference image into the upload area, or click to select it. File Mode parses the file locally so the system can read the layout and key messaging, and the uploaded file is not retained in the cloud after generation. That is useful when the source material is a pre-launch visual, a client reference, or any file you would rather not keep on a server long-term.
Once the image is attached, add a short intent note in the input box — one or two sentences is enough. For this walkthrough we kept it simple: review the file content, apply a mainstream design style that suits it, and generate the corresponding HTML web page or mobile page. If you already have a written brief, File Mode also accepts DOCX, MD, or TXT alongside the image, so the image can define the look while the document defines the message.
Right next to the send button you will see a Thinking toggle. For denser materials — a multi-section mockup, a long brief, or a poster packed with features — turn it on so the system spends more effort understanding the content before building the page. For a clean single-message reference like this one, regular generation is usually fast enough.
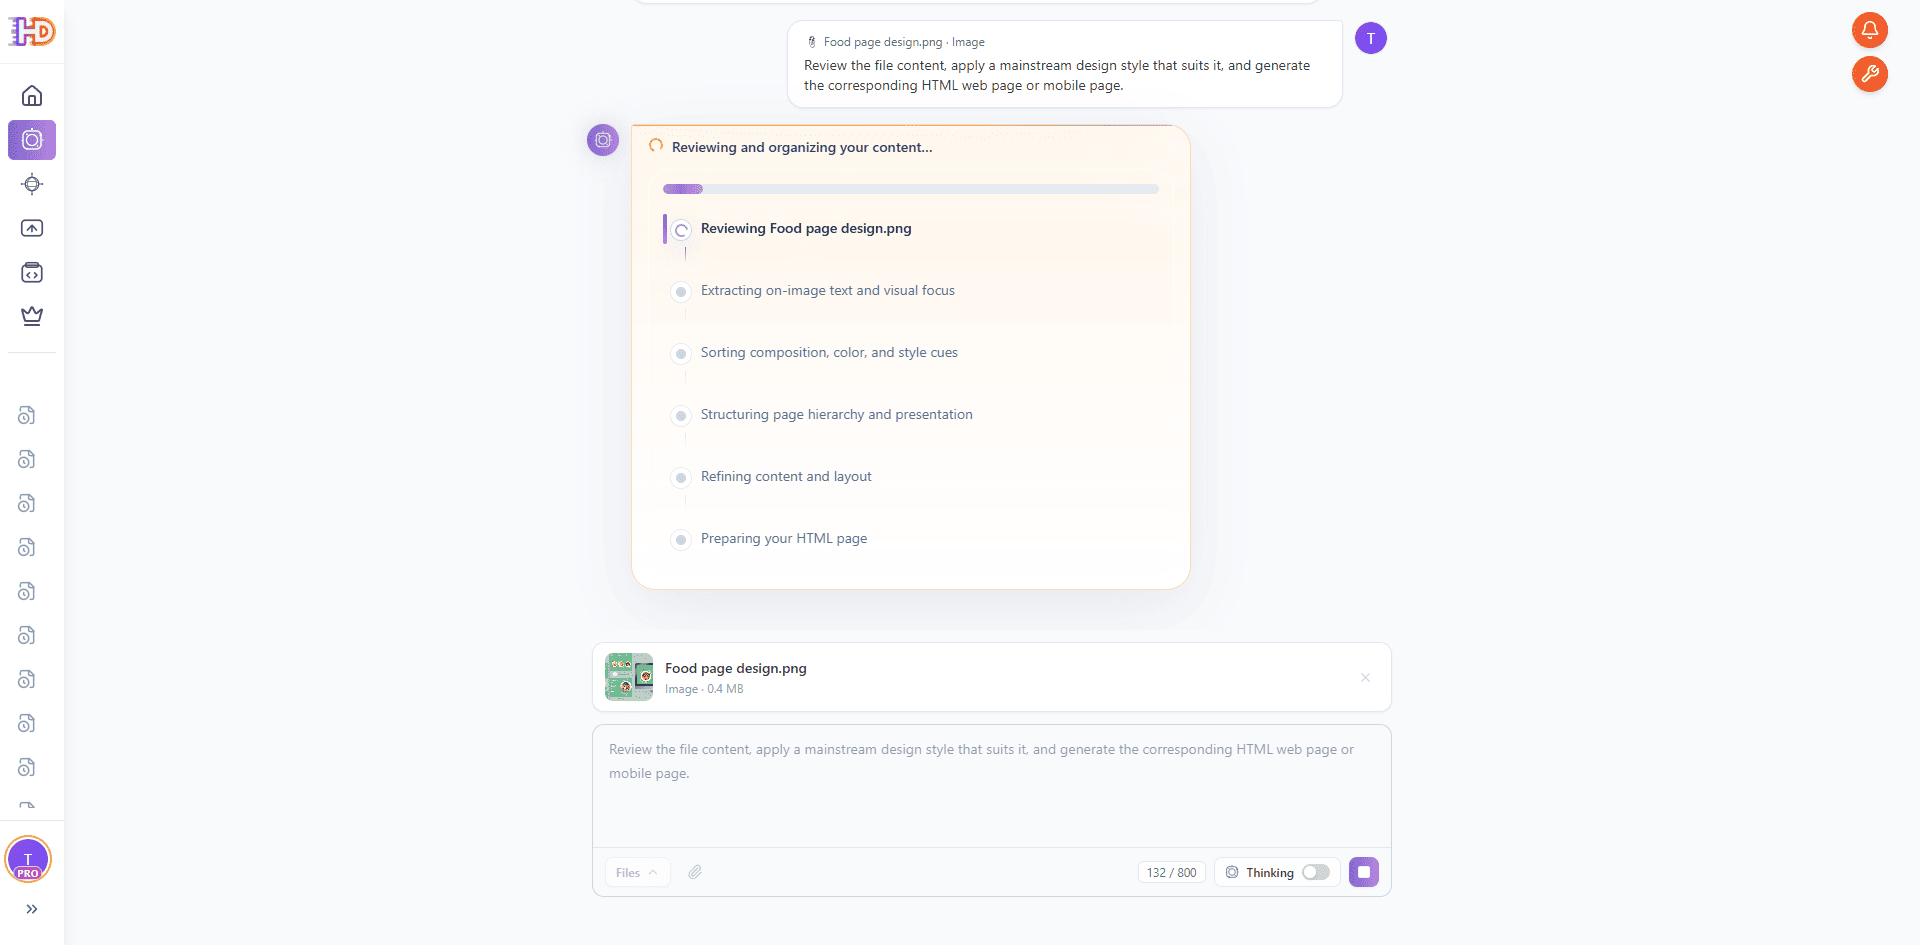
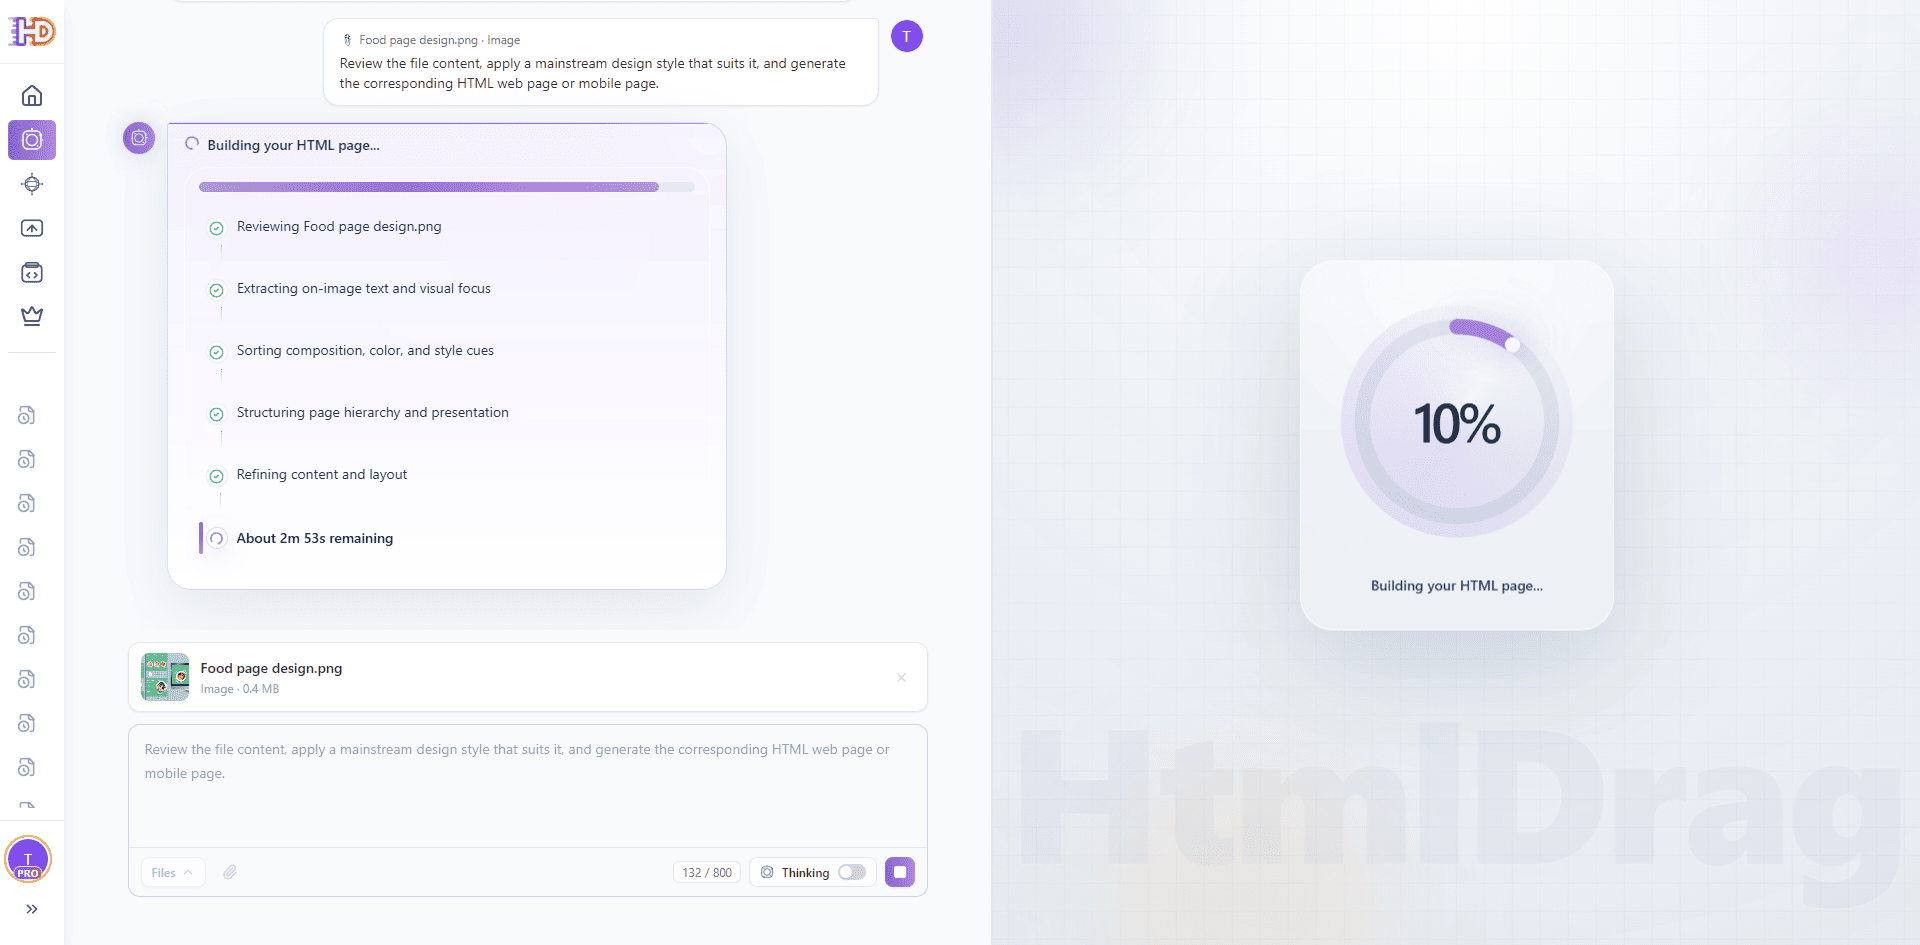
Step 4: Watch File Mode Review the Image and Build the HTML Page
After sending, File Mode walks through its reasoning visibly. You will see named stages such as reviewing the uploaded file, extracting on-image text and visual focus, sorting composition and style cues, structuring the page hierarchy, and refining content and layout. This is the stage where a static image actually turns into a structured page plan, not just a loading animation.
Once the content is organized, File Mode moves on to actually building the HTML page. A progress indicator appears alongside an estimated time remaining so you know roughly how long the page needs to come together. For a reference image of this kind, a complete landing page usually takes a few minutes instead of a full project cycle.
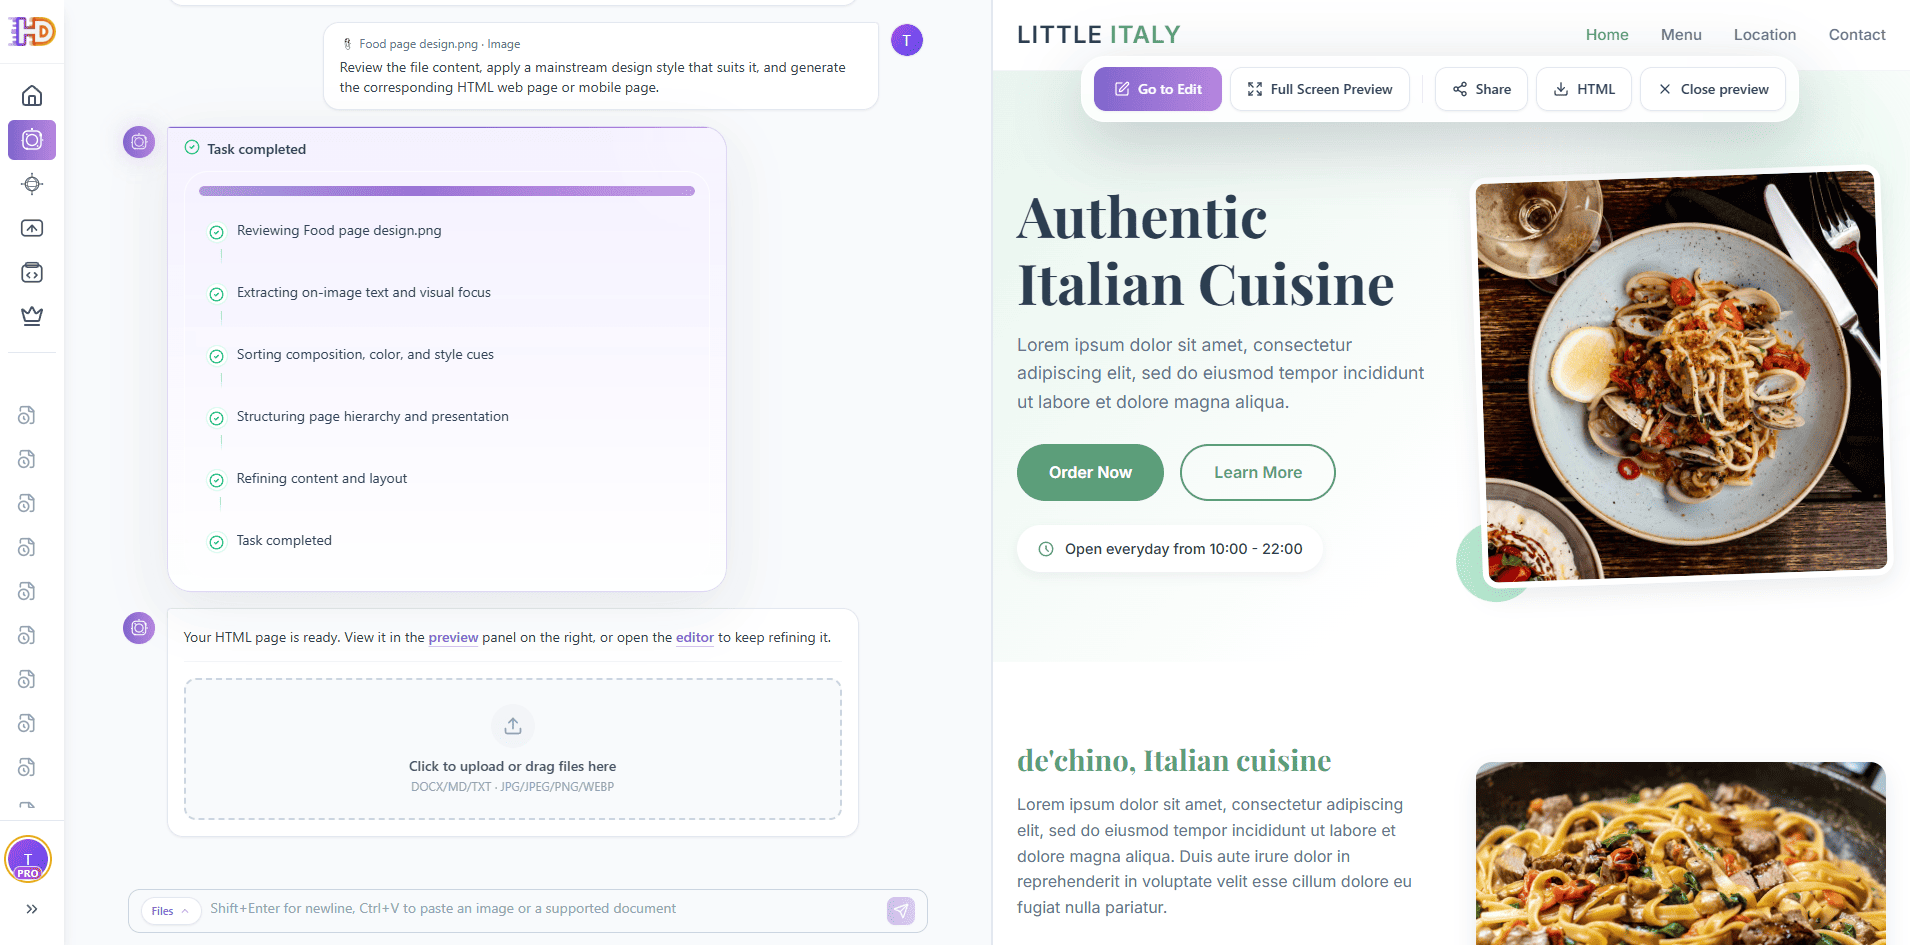
Step 5: Preview the Landing Page and Open the Editor to Keep Refining
When the task completes, the generated HTML landing page appears on the right side of the workspace. A top action bar offers Go to Edit, Full Screen Preview, Share, HTML, and Close preview, so you can immediately preview, share, or download the page you just created from the reference image.
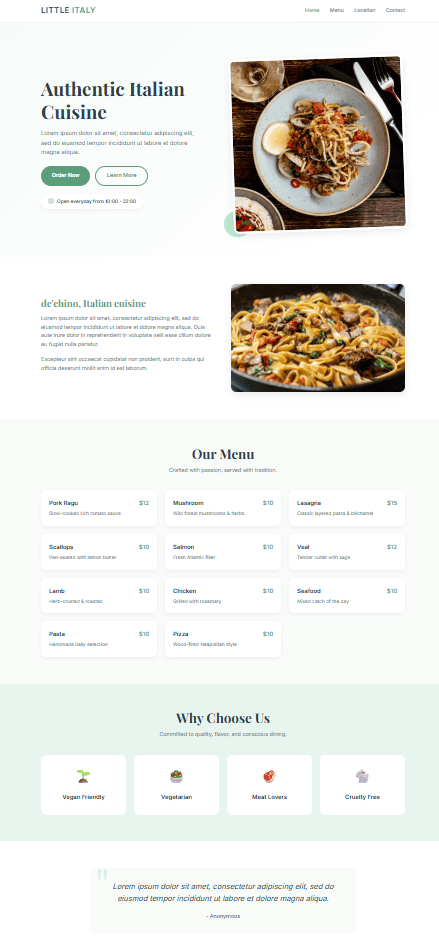
Scrolling through the full preview, you can see the complete landing page that File Mode assembled from a single reference image: a hero section with a clear CTA, a secondary feature block, a structured Our Menu section with prices, a Why Choose Us row, and a customer review area. The structure, hierarchy, and style direction are already coherent — which is what makes the output feel like a page rather than a screenshot rebuild.
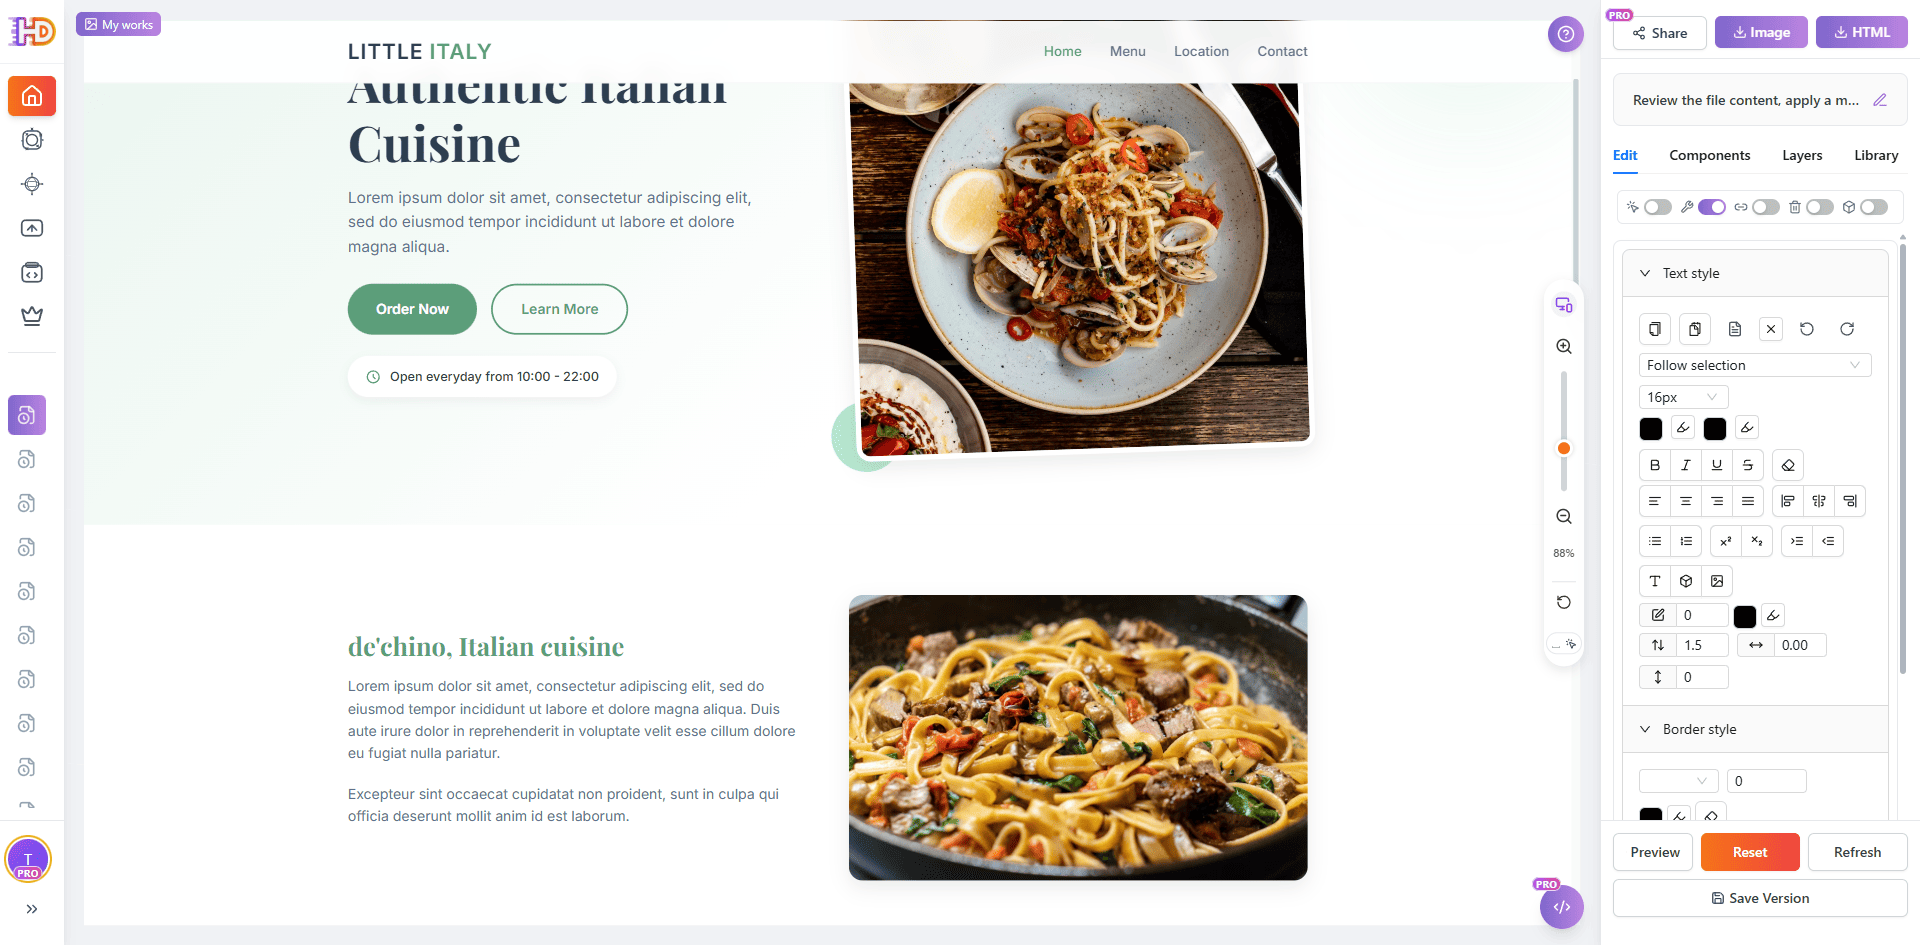
Click Go to Edit to jump straight into the editor. The generated page opens as an editable HTML canvas with a right-side panel for text style, border style, layout, components, layers, and library. From here, you are no longer reading a render — you can refine copy, tweak typography, adjust spacing, replace images, and reorganize sections visually until the page actually feels shippable.
Bonus: No Reference Image? Use Template Mode With Custom Style and HTML Size
Not every page starts from a visual. When you do not have a reference image or document, switch to Template Mode. Template Mode rebuilds the original AI generation experience with a clearer interaction flow and two options that matter for landing pages: custom style and custom HTML size.
Custom style lets you steer the visual direction before generation so the result feels closer to the brand you want. Custom HTML size lets you set the page dimensions up front, which makes it much easier to produce pages sized for a specific display, device, or embed context. Together, they bring some of the control of a design tool into a generation-first workflow, without asking you to open a design file.
Editing tip: If an uploaded file does not look like it was read correctly, re-upload it and make sure the key message area is clearly visible in the image. For complex materials, combining Thinking with a short intent note usually produces a cleaner first draft than either one alone.
Plain Image-to-Code vs Image-to-Landing-Page With AI Creator
| Focus Area | Plain Screenshot-to-Code Tool | AI Creator File Mode + Thinking |
| Starting input | Usually a single screenshot, mainly optimized for UI reconstruction | Design image, poster, screenshot, or DOCX / MD / TXT brief treated as a first-class input |
| Output shape | HTML/CSS fragment that still needs cleanup to feel like a page | A structured HTML landing page with hero, sections, and CTA wired together |
| Handling complex materials | Tends to flatten dense layouts into one long block | Thinking analyzes denser materials first, so the structure stays closer to the reference |
| Style and size control | Style is implicit, size is often fixed by the tool | Template Mode adds custom style direction and custom HTML size before generation |
| What happens after generation | You usually drop the code into another editor to continue the work | The generated page opens directly in an editable HTML canvas to refine and ship |
Who This Workflow Helps Most
- Founders who already have a product poster, a Figma export, or a reference screenshot and need a landing page fast
- Marketers who want to turn campaign visuals into working landing pages without waiting on a developer
- Designers who want to see an image or mockup as an editable HTML page instead of recreating it from scratch
- Consultants and freelancers who deliver landing pages to clients from mixed inputs — images, briefs, and rough notes
- Non-technical operators who want to generate a landing page from an image without touching code or design tools
FAQ
What kinds of images work best for generating a landing page?
Anything where the key message is visible: a product poster, a landing page mockup, a UI screenshot, a feature comparison image, or a clean photograph with supporting text. The clearer the content and hierarchy in the image, the closer the first generated landing page will feel to what you had in mind.
Can I use a document instead of an image?
Yes. File Mode also accepts DOCX, MD, and TXT. If your starting point is a short brief or product description instead of a visual, you can upload it directly. You can also combine an image with a document to define both the look and the message at once.
When should I turn on Thinking?
Turn on Thinking when the uploaded material is denser or more structured — multi-section mockups, long briefs, or posters packed with features and proof points. For a simple one-message poster, regular generation is usually fast enough. Thinking shines when the page needs a clearer hierarchy across hero, features, and CTA.
Does File Mode store my uploaded files?
Files are parsed to extract the content needed for generation, and the uploaded file itself is not retained in the cloud afterwards. That is useful when the source material is a pre-launch visual, a client reference, or any file you prefer not to keep on a server long-term.
What if I do not have any reference image or document?
Use Template Mode. You can describe the landing page you want, choose a clearer custom style direction, and set a custom HTML size before generation. It is the best path when you need a landing page but do not yet have a specific visual reference to point at.
Can I continue editing the generated landing page?
Yes. The generated output is a real HTML page that opens directly in the editor, so you can continue refining text, replacing images, adjusting layout, and reorganizing sections visually. The generation step gives you a working first draft; the editing step turns it into the page you actually want to ship.
Final Take
A design image, a promotional poster, a reference screenshot, or a short brief does not have to be something you just stare at before rebuilding a landing page by hand. With AI Creator File Mode, that same material becomes the input for the page itself: upload it, optionally pair it with an intent note or a document, turn on Thinking when the content is denser, and you end up with a real HTML landing page instead of yet another static render to interpret.
When the reference image is not available, Template Mode keeps the same generation-first workflow and adds control where it matters most — custom style and custom HTML size — so you are not stuck with a default layout that never quite fits. Together, File Mode, Thinking, and Template Mode turn the path from visual idea to a working landing page into something measured in minutes instead of days.
If you want a faster way to generate a landing page from an image without coding, this is the flow worth trying first. Your visuals and briefs stop being reference-only material and become the actual starting point of the page.